Wednesday, March 30, 2011

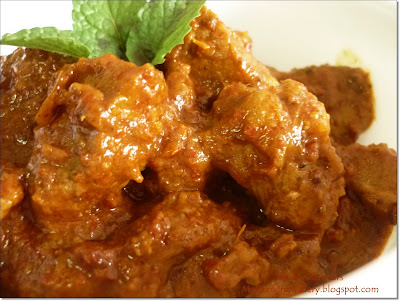
Goan Pork with Hot Spices

Today, I'm posting the recipe for Goan Pork with Hot Spices which I served with Aromatic Indian Rice with Peas and a vegetable curry, Cauliflower, Pea and Potates Curry, recipes which can be found at my previous post. This dish is popular in Goa, which is situated on the west coast of India. Goa is influenced by three religions, Hinduism, Islam and Christianity. So beef and pork cuisines are quite common in this part of India.


This dish is tasty and really good eaten with the Aromatic Indian Rice. It is not overly spicy and has the sweet aroma of the cinnamon. I think that replacing the pork with beef should be great too.


This recipe is taken from "Curries 500" by Mridula Baljekar, which is my current obsession for Indian food! 
Much as I like this cookbook, I found that she has a totally different approach in writing out the instructions. Unlike my other cookbook by Raghaven Iyer which is more precise in letting us know at the beginning of the recipe on when to prepare the spices that are either needed to be milled to fine powder or pounded coarsely, and keep that aside until needed, Mridula Baljekar has a different approach. You would find that the instructions for grinding the spices needed to a fine powder comes somewhere in the middle of the cooking instructions, as you can see from the recipe below. So careful reading of the instructions is needed to prepare all the necessary before you start cooking. 


For this recipe, my advice is to prepare step no 2 and no 5 first before you start cooking, and keep them aside until needed. 

Goan Pork with Hot Spices
(adapted from "Curry 500" by Mridula Baljekar)
Serves 4
60ml / 4 tbsp vegetable oil
15ml / 1 tbsp grated fresh root ginger
15ml / 1 tbsp crushed garlic
2.5cm / 1 in piece cinnamon stick, broken up
2-4 dried red chillies, chopped or torn
4 cloves
10ml / 2 tsp cumin seeds
10 black peppercorns
675gm /1-1/2lb cubed leg of pork, crackling and fat removed
5ml / 1 tsp ground turmeric
200ml / 7fl oz/scant 1 cup warm water
25ml / 1-1/2 tbsp tomato puree (paste)
2.5ml / 1/2 tsp chilli powder (optional)
1 large onion, finely sliced
5ml  / 1 tsp salt
5ml / 1 tsp sugar
10ml / 2 tsp cider vinegar

  1. Heat 30ml/2 tbsp of the oil in a wok, karahi or large pan, and add the ginger and garlic. Fry for 30 seconds.
  2. Grind the next five ingredients to a fine powder, using a spice or coffee grinder. Add the spice mix to the pan and fry for a further 30 seconds, stirring.  (I pan fry in a dry pan over low heat all the 5 ingredients until aromatic and crisp, let cool on a plate, then mill to a fine powder, it is easier to mill if spices are crisp and brittle)
  3. Add the pork and turmeric to the pan and increase the heat slightly. Fry for about 5-6 minutes or until the meat starts to release its juices, stirring regularly.
  4. Add the water, tomato puree and chilli powder; if using, to the pan and bring to the boil. Cover the pan with a lid and simmer gently for 35-40 minutes. (You may add a little water at a time, as it will evaporate during cooking)
  5. Heat the remaining oil and fry the onion for 8-9 minutes until browned, stirring regularly.
  6. Add the fried onion to the pork along with the salt, sugar and vinegar. Stir, cover and simmer for 30-35 minutes or until the pork is tender. Remove from the heat and serve.

Monday, March 28, 2011

My Indian Dinner, Again?

Yes, again! I am currently having a crave for Indian food, which has always been one of my favourites. Luckily, my hubby is not complaining! Over the years, looks like I have turned him from one who is not familiar with spicy food, to someone who looks forward to any spicy dish that I cook!

For our dinner a couple of days ago, I cooked an Indian Rice that goes together with a vegetable curry and a spicy meat dish. It was really good. I'm giving two of the recipes first, otherwise this post will be really long.


My Indian dinner menu :
Aromatic Indian Rice with Peas
Cauliflower, Pea and Potato Curry
Goan Pork with Hot Spices

********************

Aromatic Indian Rice with Peas: just as the name implies, this is an aromatic rice with the fragrance from the cardamom pods, cinnamon and cloves. This rice is good eaten with any curries. You may follow the instructions on how to cook the rice, or for convenience, cook it in the rice cooker, as I did. It cooked perfectly.


Aromatic Indian Rice with Peas
(adapted from "Curries 500" by Mridula Baljekar)
Serves 4
1-3/4 cups basmati rice
600ml/2-1/2 cups water
3 tbsp ghee or 2 tbsp vegetable oil and a small amount of butter
1 cinnamon stick
6-8 cardomom pods, crushed
4 cloves
1 onion, halved lengthways and sliced
25gm fresh root ginger, peeled and grated
1 tsp sugar
130gm fresh peas, shelled, or frozen
1 tsp salt
  1. Rinse the rice and put it in a bowl. Cover with plenty of water and leave to soak for 30 minutes. Drain thoroughly.
  2. Heat the ghee, or oil and butter, in a heavy pan. Stir in the cinnamon stick, cardamom and cloves.
  3. Add the onion, ginger and sugar to the pan, and fry until golden, stirring frequently. Add the peas, followed by the rice, and stir for 1 minute to coat the rice in ghee.
  4. Pour in 600ml/2-1/2 cups water. Add the salt, stir once and bring the liquid to the boil. Reduce the heat and allow to simmer for 15-20 minutes, until the liquid has been absorbed.
  5. Turn off the heat, cover the pan with a clean dish towel and the lid, and leave the rice to steam for a further 10 minutes. Spoon the rice on to a serving dish.
(my notes : I cooked the rice in the rice cooker. Follow instructions up to step 3, transfer everything into the rice cooker pot, add water and salt, stir, cover and leave to cook! Simple and easy!)


********************

Cauliflower, Pea and Potato Curry : A light wonderful curry that is suitable for vegetarians. The potatoes are pre-fried first and the cauliflower are blanched briefly in hot water. I did the short cut way, (no need to wash addtional pot for blanching, am lazy!), just microwave the cauliflower on high for 2 minutes.


Cauliflower, Pea and Potato Curry
(adapted from "Curries 500" by Mridula Baljekar)
Serves 4
500gm/1-1/4 lb potatoes
1 small cauliflower or 350gm/12 oz cauliflower florets, with outer stalks removed
45ml/3tbsp sunflower oil or olive oil
1 large onion, finely sliced
5ml/1 tsp ginger puree
5ml/1 tsp garlic puree
2 green chillies, chopped, seeded if preferred
2.5ml/1/2 tsp ground turmeric
5ml/1 tsp ground coriander
175gm/6oz fresh tomatoes, chopped
5ml/1 tsp salt, or to taste
115gm/4 oz frozen garden peas
15ml/1 tbsp chopped fresh coriander (cilantro), to garnish
  1. Halve or quarter the potatoes - the pieces should be quite chunky so that they do not fall apart during cooking.
  2. Divide the cauliflower into 2.5cm/1 in florets, then blanch them briefly and plunge them in cold water. (I microwave on HIGH for 2 minutes)
  3. Heat the oil in a large, non-stick pan over a medium to high heat and brown the potatoes in two or three batches until they look a little like roast potatoes. Drain them thoroughly on absorbent kitchen paper.
  4. In the same oil, fry the onion, ginger, garlic and chillies over a low to medium heat, stirring regularly, for 6-8 minutes or until the mixture begins to brown.
  5. Add the ground turmeric and coriander; cook for 1 minute and then add the tomatoes, fried potatoes and salt. Pour in 400ml/14fl oz/1-2/3 cups warm water. Bring this to the boil, reduce the heat to low, then cover and cook for 15 minutes.
  6. Drain the cauliflower and add to the pan with the coated potato mixture. Add the peas, cook for 5 minutes. Remove from the heat and serve, garnished with coriander.

The recipe for Goan Pork with Hot Spices shall be on the next post. 


Saturday, March 26, 2011

Dried Cranberry Scones

This scone is delightful when eaten warm. I ate two of these while they are still warm.  The sour cream gives a soft and moist texture with a buttery taste! It is so easy and quick to put together, you'll be enjoying this within an hour!  


Like most scones, this is good when eaten warm, fresh from the oven.  It is not so soft on the next day, but that doesn't stop me from dunking them into my cup of hot coffee!

I'm sharing this with 


Dried Cranberry Scones
(adapted from "Baking With Love" by Reader's Digest)
Serves 18
Ingredients :
375gm (3 cups/13oz) self-raising flour
55gm (1/4 cup/2 oz) caster sugar
310gm (1-1/4 cups/11 oz) sour cream
30gm (1 oz) butter, melted
1/4 teaspoon orange essence (my addition)
1 large egg, lightly beaten
150gm (1 cup/5-1/2 oz) sweetened dried cranberries
60gm (1/2 cup/2 oz) icing sugar
1 teaspoon freshly grated orange zest
1 tablespoon fresh orange juice
  1. Use 2 large baking trays and line with baking (parchment) paper. Preheat oven to 200C (400F), gas mark 6. Combine the flour and sugar in a large bowl; make a well in the centre. Combine sour cream, butter, orange essence and egg in a small bowl and pour into well. Stir with a fork until moistened; stir in cranberries. With floured hands, gently knead dough in the bowl just until combined.
  2. Turn dough onto lightly floured work surface and shape into a 23cm (9-in) square, about 2.5cm (1 in) thick. Cut into 9 pieces 7.5cm (3 in) squares. Cut each square into 2 triangles. Place scones on baking trays 2.5cm (1 in) apart. Bake until golden, about 15 minutes.
  3. Place wire rack on a sheet of baking paper. Combine icing sugar, orange zest and juice for a glaze. Place the scones on the rack and, while still hot, drizzle glaze over them.

Wednesday, March 23, 2011

Quick-fried Spicy Prawns

Looking for a mild curry that the whole family would enjoy? This would be it. Although I love spicy food, this is a nice change, it is a mild curry that even my kids like. Another lovely recipe from Mridula Baljekar. Looks like I'm cooking through this book, isn't it, well at least I am, for now! 


The recipe calls for coconut milk, which I do not have, and since I'm lazy to go out and buy some,  so I use fresh milk instead.


Goes really well with plain white rice. Yummy!


Now why is the photo in the cookbook is all red and spicy??  Even the name of this dish is Quick-fried Spicy Prawns, but there is nothing spicy about this dish. I followed exactly as the recipe and even added an extra half teaspoon of chili powder. The only reason is I think my chili powder is not spicy enough. I should look for a fiery chili powder at my next visit to the Indian store! Anyway, this turned out really tasty, a dish that I don't mind cooking again!

I'm sharing this with Full Plate Thursday over at Miz Helen's Country Cottage

Quick-fried Spicy Prawns
(adapted from "Curries 500" by Mridula Baljekar)
Serves 4
450gm / 1lb large raw prawns
2.5cm / 1in fresh root ginger, grated
2 garlic cloves, crushed
5ml / 1 tsp hot chili powder
5ml / 1 tsp ground turmeric
10ml / 2 tsp black mustard seeds
seeds from 4 green cardamom pods, crushed
50gm / 2oz / 1-1/4 cup ghee or butter
120ml / 4fl oz / 1/2 cup coconut milk
salt and ground black pepper
30-45ml / 2-3 tbsp chopped fresh coriander (cilantro), to garnish
naan bread, to serve

  1. Peel the prawns carefully, ensuring that the tails are left attached to the main body.
  2. Using a small, sharp knife, make a slit along the back of each prawn and remove the dark vein. Rinse well under cold running water, drain and pat dry with kitchen paper.
  3. Put the ginger, garlic, chili powder, turmeric, mustard seeds and cardamom seeds in a bowl. Add the prawns and toss to coat completely in the spice mixture.
  4. Heat a karahi, wok or large, heavy frying pan until hot. Add the ghee or butter and swirl it around until it begins to foam, taking care to not let it burn.
  5. Add the spiced prawns to the pan and stir-fry for about 1-1/2 minutes until they are just turning pink.
  6. Stir in the coconut milk and simmer for 3-4 minutes until the prawns are just cooked through. Season to taste with salt and ground black pepper.
  7. Sprinkle with the chopped fresh coriander and serve immediately, with naan bread.

Monday, March 21, 2011

Rebecka's Apricot & Ginger Conserve

Dried apricots are my favourite dried fruit. It is at the top of my list for dried fruits. I always have a packet of dried apricots in my pantry. There's something about them, pop one in the mouth and you'll reach for another one. I love the tangy sourish sweet taste and the  unmistakenly wonderful smell of apricots! 


I love their vibrant, cheerful, happy yellow, colour of sunshine brightness! When I came across this recipe for Apricot and Ginger Conserve over at Rebecka's blog from At Home With Rebecka, I really wanted to make this. Rebecka uses fresh apricots! How I would love to have fresh apricots, but they do cost a bundle over here! Rebecka advises me to use dried apricots instead, and I did! These Apricot and Ginger Conserve turns out to be so good! Rebecka even added dried mangoes for extra flavour. I did not since I can't find any!


Since I use the Dried Apricots instead of the fresh ones, I cut them in half and soak them in unsweetened apple juice for about 8 hours, to plump them up first. Then I cooked them as per Rebecka's instructions. I did not use any pectin for these as the conserve set up rather well. Now what is a conserve? I get confused sometimes over conserve, jam and preserve. As what I understood from "Homemade Preserves" by Maggie Mayhew, a brief explanation, "These are similar to jams, but they have a slightly softer set and contain whole or large pieces of fruit". 


These are what I got from the three cups of dried apricots. I used my recycle bottles from the mayonnaise and pasta sauces that I bought, so the sizes varies. All in, estimated yield, about 4 bottles of 250ml sizes.


These are really good, the chunky pieces of apricots and the sliced candied ginger are full of flavour.


Guess where this spoonful end up after taking this photo?  Mmmm.... delicious!!


Hop over to At Home With Rebecka for the full recipe and read a charming childhood story of how Rebecka and her brothers used to go berry-picking for her mom. I love reading stories like this!

Since I used the dried apricots, I did a little adjustments. Here's my recipe :


Dried Apricots and Ginger Conserve
(source from At Home With Rebecka, with slight adjustments. For the original recipe that calls for Fresh Apricots, please visit Rebecka's blog, I think using Fresh Apricots will be more flavourful!)
3 cups dried apricots, cut to half
3 cups unsweetened apple juice
1/4 orange juice
juice from half of one small lemon
1 tsp grated orange zest
1 tsp grated lemon zest
1/3 cup candied ginger, sliced
1/2 cup sugar

  1. Slice dried apricots in half. Place in a bowl and add the rest of the ingredients except candied ginger and sugar. Leave aside, covered, for about 8 hours.
  2. Transfer contents into a deep saucepan, add in candied ginger and simmer slowly until apricots are tender. Stir frequently and when apricots are soft but not mushy (as this is a conserve), add in sugar.
  3. Cook until sugar melts and mixture is thick. 
  4. Remove from heat and pour into prepared sterilized jars and seal. Enjoy!

This is one  delicious tasty conserve that I'll be making again. The addition of candied ginger is really fabulous! Thank you, Rebecka for this wonderful recipe! 


Friday, March 18, 2011

P.F.Chang's Stir-Fried Spicy Eggplant

I have never heard of P.F.Chang before this! From the info I read when I google, it is a very well known and famous chain of restaurants in U.S. Now what I do know is, this is a really delicious dish. I got this copycat recipe from Recipe Goldmine website. I have not tried the original version as I have never set foot in U.S before, so I would not know how the original would taste like. Without a doubt, should be good!


This dish is extremely easy to prepare, just combine all the ingredients for the sauce in a bowl, and stir it in during cooking. Simple, quick and easy.


The recipes states to peel the eggplants. I did not bother because the ones I bought are really young and tender. Even though the recipe doesn't call for scallions (spring onions), I added them and I'm glad I did!


The balance of the flavours are just right, sweet, salty, sour and a hint of spiciness, it's all in one dish.


Serve this piping hot, really delicious with plain white steamed rice!

I'm sharing this with these fabulous sites, be sure to visit them to see other delicious yummies!

Full Plate Thursday over at Miz Helen's Country Cottage
Recipe Swap Thursday over at Prairie Story
Copycat Club over at Buttercream Barbie  (Tia will showcase all copycat yummies on the 7th of each month, visit Buttercream Barbie for more details)

P.F.Chang's Stir-Fried Spicy Eggplant
(source from : Recipe Goldmine)
1 pound eggplant, peeled, cut into 1-inch dice
1 teaspoon garlic
1 tablespoon cornstarch mixed with 2 tablespoons water to make a paste
canola oil for deep-frying

Spicy Sauce
2 tablespoons vegetarian oyster sauce (or substitute oyster sauce)
2 tablespoons Lite soy sauce
2 tablespoons water
1 tablespoon white vinegar
1 tablespoon granulated sugar
1 teaspoon chili paste (Sambal Oelek preferred)
1/2 teaspoon ground bean sauce (Koon Chun preferred)
1/2 teaspoon sesame oil

Combine all Spicy Sauce ingredients and mix well.

In a wok, deep-fry eggplant at 350 degrees F for 1 minute. Remove eggplant and drain on paper towels.

Meanwhile, remove all but 1/2 teaspoon of oil from wok. On high heat, stir-fry garlic for 5 seconds then add Spicy Sauce. Reduce heat and let sauce simmer 20 seconds. Add eggplant and simmer for another 10 seconds. Stir in cornstarch paste a little at a time until desired consistency. Serve immediately.

(my notes : I did not add the cornstarch solution as the dish is fairly dry)


Wednesday, March 16, 2011

Rocky Road Brownie And Award

These brownies are really good. It is  first baked, with the topping scattered over the top during the last 5 minutes of baking. What's not to love about brownies, especially when chocolates and marshmallows comes together, heavenly!


I doubled up the recipe using the recommended 9" baking pan. The brownie bakes beautifully, it is only about 1-1/2 inches high. Except for the sugar, I only use half the sugar called for, and it is just perfect. The ingredients for the topping remains the same amount, as I used the 9" square baking pan as advised, though I did add a little more marshmallows and walnuts. 


I baked this doubled recipe for 30 minutes and a further 6-7 minutes after the marshmallow, chocolate chips and nuts topping are scattered over the top.


Once baked, let it cool for 10 to 15 minutes or so, then by all means, indulge, you don't have to wait for them to cool down completely! These taste really good when it is still warm with the marshmallows soft and gooey and the chocolate soft and melting!


Rocky Road Brownies
(adapted from "Cookies &' Treats" Favourite Brand Names)
Makes 1-1/2 dozen brownies
1 cup miniature marshmallows 
1-1/4 cups Hershey's Semi-Sweet Chocolate Chips
1/2 cup chopped nuts
1/2 cup (1 stick) butter or margarine 
1 cup sugar (for double recipe, remain as 1 cup sugar)
2 eggs
1 teaspoon vanilla extract
1/2 cup all-purpose flour
1/3 cup Hershey's Cocoa
1/2 teaspoon baking powder
1/2 teaspoon salt

  1. Heat oven to 350F. Grease 9-inch square baking pan.
  2. Stir together marshmallows, chocolate chips and nuts; set aside. Place butter in large microwave-safe bowl. Microwave at HIGH (100% power) 1 to 1-1/2 minutes or until melted. Add sugar, eggs and vanilla, beating with spoon until well blended. Add flour, cocoa, baking powder and salt, blend well. Spread batter in prepared pan.
  3. Bake 22 minutes. Sprinkle chocolate chips mixture over top. Continue baking 5 minutes or until marshmallows have softened and puffed slightly. Cool completely. With wet knife, cut into squares.

**************************************************

Awards!


I would like to thank Sonali of Only Fish Recipes  and Jay from Tasty Appetite for passing on the award to me. 

Sonali of Only Fish Recipes has a wonderful blog with delicious curries of fish that makes you want to go right into the kitchen to get that curry going. If you are looking for delicious fish recipes, give her blog a visit and you will keep going back for fish dishes inspirations. 

Jay from Tasty Appetite, has a wonderful blog with mouth-watering yummies. Her varieties on Indian food and desserts are really fantastic! A sneak into her site will bring you back again, definitely.

Rules:
1.
Accept the award. Post it in your blog with the name of the blogger who has given u this award with a link to his/her blog.
2.Pass it on to 15 other blogger friends…. to keep the ball rolling.
3.Let the nominated blogger know about their award [leave a comment in their most recent post].

I would like to pass on the above award to the following fabulous blogs, at random order :


Thank you !


Monday, March 14, 2011

Kahlua and Cream Muffins

If you have a bottle of Kahlua in your pantry, in your liqueur cabinet, anywhere else for that matter, go make this muffins. These are really good, when eaten straight out of the oven, well, almost straight out, let it cool for 5 minutes or so, then eat! 


The smell of the Kahlua and the coffee is a delight. It is not overpowering strong, but light and strong enough for the wonderful aroma of coffee and Kahlua mixed together. Before baking, the top is sprinkle with some heavy cream and a little demerara sugar, I use light brown sugar as I do not have demerara sugar. I can almost smell the cream during baking, or rather, because I know that there is cream in the muffins and in the topping!


Even my son, who was watching the telly, came into the kitchen and asked me what is the wonderful smell that I'm baking, he says, smells like coffee. He has my nose, yup, definitely! As in the case of my hubby, for crying out loud, gave one muffin for him to try, and he says he can't smell the coffee! I asked him jokingly "are you having a cold, or has your nose gone on a holiday!!",   :)  He! He! 


As can be seen on the top of the muffin, the white speckled effect of the cream.  


This is really good with a cup of coffee, with cream. As with most muffins, eat it while it is still very warm. It is still very good eaten at room temperature. I had this for my breakfast this morning with a cup of hot coffee and the flavours of the coffee and Kahlua seems to mature overnight and tastes really good.  Make this just in time for tea or breakfast. It is so easy and simple that by the time the muffins are placed into the oven for baking, it will be ready by the time you finished up your washing and made yourself a cup of coffee! Just on time to sit back and relax, reward yourself after all the 'hard work' with a warm delicious muffin and a cup of hot coffee. 


It is really soft, moist and full of coffee flavour. Very good!


Kahlua and Cream Muffins
(adapted from "Mad About Muffins" by Diana Bonaparte)
Makes 12 muffins
300gm/10-1/2 oz plain (all-purpose) flour
1 tbsp baking powder
1/8 tsp salt
5gm/1 tbsp instant coffee powder or granules
170gm/6 oz light muscovado sugar (I use light brown sugar)
2 eggs
100gm/3-1/2 oz Kahlua coffee liqueur
190gm/6-3/4 oz double (heavy) cream
1 tsp vanilla essence (extract)
100gm/3-1/2 oz butter

For The Topping :
100gm / 3-1/2oz double (heavy) cream
30gm / 1 oz demerara sugar (I use light brown sugar)

  1. Preheat the oven to 200C/400F/gas 6/fan oven 180C. Grease and flour 12 muffin tin sections or line with paper liners.
  2. Sift the dry ingredients into a large bowl, using a spoon to push the coffee and light muscovado sugar through the sieve (strainer).
  3. Combine the eggs, Kahlua, double cream and vanilla in a medium-sized bowl and mix well with a fork. Try not to thicken the cream. Melt the butter in a small bowl in the microwave or in a small saucepan.
  4. Add all the wet ingredients to the dry ingredients and gently fold together with a large metal spoon until just moistened.
  5. Spoon the batter into the prepared muffin tin.
  6. Spoon double cream over the muffins (about 1/2 tbsp each), then sprinkle with demerara sugar.
  7. Bake for 20-23 minutes until well risen and golden and the tops of the spring back when gently pressed.
  8. Transfer to a wire rack to cool a little before eating.


Saturday, March 12, 2011

Apple Streuselkuchen

The actual recipe from my new favourite bread book, "Bread Machine" by Jennie Shapter is Peach Streuselkuchen. I do not have any peaches, so I use apple instead. This is really good! The bread is soft and fluffy and the topping of apple streusel is wonderful. It is really easy and simple. Between my daughter and myself, we finished almost half the bread! We had this for lunch! A cup of warm Earl Grey tea is really nice with a slice, or two of this lovely bread.


I have made two recipes from this book and I like them both. The first one I made was  a savoury bread, Fresh Tomato and Basil Loaf, a delicious loaf and great as a sandwich bread. I borrowed the book from my sister, and after I've made the delicious Fresh Tomato and Basil Loaf, I decided to get one myself, as I'm dying to try out other recipes. I'm really glad I did. 


Peach (Apple) Streuselkuchen is a German yeast bread with a struesel topping of the mixtures of almonds, flour, butter and cinnamon. I only use about 1/4 teaspoon of the cinnamon instead of 1 teaspoon as given, as my kids do not like the overpowering smell of cinnamon. It actually works out fine with 1/4 teaspoon, the smell of the cinnamon is really light and nice, not too strong.


This is a lovely bread to have for an afternoon tea or as a light lunch. Do not forget to make a cup of warm sweet tea to enjoy these together.


The bread is fluffy and soft, really good.


I'm sharing this lovely bread with 

Peach Streuselkuchen
(adapted from "Bread Machine" by Jennie Shapter)
100ml / 7 tbsp milk
1 egg
250gm / 2-1/4 cups unbleached white bread flour
1/2 tsp salt
40gm / 3 tbsp caster sugar
25gm / 2 tbsp butter, melted
1 tsp easy bake (rapid-rise) dried yeast
4 peaches, halved and stoned (pitted) (I use 4 small apples, peeled, cored and sliced thickly)

For the topping :
75gm / 3/4 cup plain flour
40gm / 1/3 cup ground almonds
50gm / 1/4 cup butter, diced and softened
40gm / 4 tbsp caster sugar
1 tsp ground cinnamon

  1. Pour the milk and egg into the bread pan. If the instructions for your bread machine specify that the yeast should go in first, reverse the order of wet and dry ingredients.
  2. Sprinkle over the flour, ensuring that it covers the milk and egg completely. Then add the salt, sugar and butter, placing them in three separate corners of the bread pan. Make a small indent in the centre of the flour (but not down as far as the liquid) and add the easy bake dried yeast.
  3. Set the bread machine to the dough setting ; use basic dough setting (if available). Press Start. Lightly oil a 25cm / 10 in springform cake tin (pan).
  4. When the dough cycle has finished, remove the dough from the pan and place it on a lightly floured surface. Knock it back (punch it down) gently, then roll it out to fit the tin. Ease it into position.
  5. Slice the peaches thickly and arrange them on top of the dough. Next, make the topping. Rub the flour, ground almonds and butter together until the mixture resembles coarse breadcrumbs. Stir in the caster sugar and cinnamon. Sprinkle the topping over the peaches.
  6. Cover the dough with lightly oiled clear film (plastic wrap) and leave in a warm place for about 20-25 minutes, to rise slightly. Meanwhile, preheat the oven to 190C/375F/Gas 5.
  7. Bake the cake for 25-30 minutes, or until evenly golden. Leave it to cool in the tin for a few minutes and serve warm, or turn out on to a wire rack to allow to cool completely.

Thursday, March 10, 2011

Fig Rolls

This is a great snack to munch on and very good with a cup of tea. Very easy and simple to make. Found this yummy treat in one of Reader's Digest's book of recipes, "Baking With Love". 


The recipes states that the dough is to be rolled to a rectangle of 20x6 inches in size. I only managed to roll it to about 16x6in, as I feel that rolling it further will result in a very thin dough, and am afraid that it might break when I fold in over the filling. I used salted butter, as I think that it gives a better taste to the dough. Of course,  a little salt may be added if unsalted butter is used.


The sweetness is just right as the fig is already sweetened, so there was no need for additional sugar in the filling.


I enjoyed this with a cup of warm tea.  

Fig Rolls
(adapted from "Baking With Love" by Reader's Digest)
Makes 20
Ingredients
125gm (1 cup/4-1/2 oz) plain (all-purpose) flour
110gm (3/4 cup/3-3/4 oz) plain wholemeal (all-purpose whole-wheat) flour
160gm (2/3 cup/5-1/2 oz) unsalted butter, cut into small pieces
65gm (1/3 cup/2-1/4 oz) light brown sugar
1 teaspoon vanilla essence (extract)
2 egg yolks
250gm (1-1/3 cups/9 oz) ready-to-eat dried figs, finely chopped
2 tablespoons lemon juice (I use only 1-1/2 tbsps)

  1. Use a large baking tray; grease. Sift flours into a mixing bowl, tipping in any bran left in the seive. Rub in butter with fingertips until mixture resembles breadcrumbs. Add the sugar, vanilla essence and egg yolks; mix to a firm dough; add 1-2 tsp water, if needed. Combine ingredients in a food processor, if preferred. Wrap in cling wrap; chill for 30 minutes.
  2. Place figs and 6 tbsp water in a small, heavy-based pan. Bring to the boil, reduce heat, cover and simmer gently for 3-5 minutes or until figs have plumped up slightly and absorbed the water. Transfer to a bowl and mash lightly with a fork to break up the pieces. Stir in lemon juice and leave to cool.
  3. Preheat oven to 190C (375F, gas mark 5). Roll out the dough on a floured surface to a rectangle 50x15cm(20x6 in). Cut dough in half lengthwise to make 2 strips.
  4. Spoon half the the mashed figs evenly along each strip, close to one of the long sides. Bring the opposite long side up and over the filling to form a log shape; press edges of dough together to seal.
  5. Slightly flatten each of the logs. Using a sharp knife, cut each log into 10 even pieces and transfer to the baking tray. Prick each piece several times with a fork. Bake for 12-15 minutes or until the pastry is slightly darkened in colour.
  6. Transfer fig rolls to a wire rack to cool. They can be kept in an airtight container for 2-3 days. Do not mix them with other cookies or they may soften.
(my notes : It took about 25 minutes for the fig rolls to brown)

Tuesday, March 8, 2011

Poori and Potato-Onion Curry

This is an extra long post, as I'm giving two recipes that goes together! 

Poori has been on  my "list-of-to-do", well now, I can put that off my mind 'peacefully' as this has been bugging me for months now! I have made and conquered poori finally, LOL! Have you made anything lately, something that has been bugging you for weeks or months that unless you make it soon, it will continue to bug you every so often? 


Poori is an Indian flatbread and is usually served at breakfast or lunch. It is made by using atta flour which can be found in Indian, Pakistani, Middle Eastern and other Asian stores. Atta is a low-protein flour, and is ideal for making these fluffy-thin flatbreads. These flatbreads are usually served with potato masala, a thick curry made with potato, lentils and vegetables.


I love the way the dough 'magically' puffs up when being fried. Be sure to drain them on kitchen paper towels as they are rather oily.  It is great eaten with vegetable curry and Raghavan Iyer has recommended that these poori goes well with Potato-Onion Curry.


Do not be daunted by the long instructions below. They are really very easy to make and doesn't take up much time at all. I made the dough first and while the dough is resting, I cook the Potato-Onion Curry. Great as a weekend breakfast or lunch. Give it a try, these poori can be eaten with any curry of your choice, though I think that they goes really well with any vegetable curry.

Poori (Puffy Whole-Wheat Breads)
(adapted from "600 Curries" by Raghavan Iyer)
From the chef : "When these pooris puff up, you know you have done a good job rolling the dough out to an even thickness. They will collapese, like a souffle, if they sit around after they are fried - but don't get too bent out of shape if that happens, because the flavour will still be the same. I particularly love these treats with some of the potato curries in this book."
Makes 10 breads :
2 cups roti flour (atta flour), plus extra for dusting
1-1/2 teaspoons coarse kosher or sea salt
2 tablespoons canola oil, plus more for deep-frying
about 3/4 cup warm water
  1. Thoroughly combine the flour and salt in a medium-size bowl. Then drizzle the 2 tablespoons oil over the salted flour, rubbing the flour through your hands to evenly distribute the oil.
  2. Drizzle a few tablespoons of the water over the flour, and stir it in. Repeat until the flour comes together to form a soft ball; you will use about 3/4 cup warm water altogether. Using your hand (as long as it's clean, I think it's the best tool), gather the ball, picking up any dry flour in the bottom of the bowl, and knead it to form a smooth, soft ball of dough (do this in the bowl or on a lightly floured surface). If it's a little too wet, dust it with a little more flour, kneading it in after every dusting until you get the right soft, dry consistency. (If you used your hand to make the dough from the start, it will be caked with dough. Scrape it back into the bowl. Wash and dry your hands, and return to the dough to knead it. You will get a much better feel for the dough's consistency with a dry hand.)
  3. Cover the dough with plastic wrap or a slightly dampened cloth, and set it aside to rest for about 30 minutes. (After 30 minutes, you can refrigerate the dough, wrapped in plastic wrap, for up to 4 days. Bring it back to room temperature before you proceed.)
  4. Using your hands, roll the dough out to form a 10-inch-long log (lightly flour the work surface if that helps.) Cut the log crosswise into 10 pieces, and shape each piece into a ball. Press each ball out to form a patty. Cover the patties with plastic wrap.
  5. Line a plate or a cookie sheet with three or four sheets of paper towels.
  6. Pour oil to a depth of 2 to 3 inches into a wok, Dutch oven or medium-size saucepan. Heat the oil over medium heat until a candy or deep-fry thermometer inserted into the oil (without touching the pan's bottom) registers 375 to 400F. (An alternative way to see if the oil is at the right temperature for deep-frying is to gently flick a drop of water over it. If the pearl-like drop skitters across the surface, the oil is ready).
  7. While the oil is heating, lightly flour a small work area near the stove and place a dough patty on it. (Keep the remaining patties covered with plastic wrap while you work on this one). Roll it out to form a round about 3 to 4 inches in diameter, dusting it with flour as needed. Make sure the round is evenly thin, with no tear on its surface. Repeat with the remaining rounds, stacking them as you make them, and flouring between the layers to prevent them from sticking to one another.
  8. Once the oil is ready, slide a dough round into the pan. It will sink to the bottom, and then within seconds it will start to bubble and rise to the top. With the back of a spoon, gently keep submerging the round when it rises to the surface, to enable the dough to puff from the inside. It will be done in less than a minute. Remove the golden-brown poori with a slotted spoon, and set it on the paper towels to drain.
  9. Repeat with the remaining rounds. Then serve.


Potato-Onion Curry is recommened by Chef Raghavan Iyer to go together with Poori. This is a mild, tasty thick curry. It is great for those who prefer a mild curry, and is suitable for vegetarian too.


The recipes states that to keep a cup of cooking water from the boiled potatoes, I would advise  to keep all of the cooking water, like I did, as I found that more than a cup is needed to cook the curry. The curry gets thicker as the potatoes breaks down and more water is needed. Add about 1/4 cup at a time until the consistency of fairly thick curry is obtained.


Potato-Onion Curry (Urulikazhangu Vengayam Bhajee)
(adapted from "660 Curries" by Raghavan Iyer)
According to Raghavan Iyer , "Tear off a piece of poori, scoop up some potato curry with it, and wrap the torn bread around it - you will see why the combination works so well."
Ingredients :
1-1/2 pounds russet or Yukon Gold potatoes, peeled, cut into 1/2-inch cubes, and submerged in a bowl of cold water to prevent browning.
1 tablespoon canola oil
1/2 teaspoon fennel seeds
6 whole cloves
2 dried red Thai or cayenne chiles, stems removed
1 cinnamon stick (1/2-inch long), broken into smaller pieces
1 tablespoon coarsely chopped fresh ginger
2 fresh green Thai, cayenne, or serrano chiles, stems removed
1 teaspoon black or yellow mustard seeds
1 tablespoon yellow split peas (chana dal), picked over for stones
1 medium size red onion, cut into 1/2-inch cubes
1-1/2 teaspoons coarse kosher or sea salt
1/4 teaspoons ground tumeric
1/4 cup finely chopped fresh cilantro leaves and tender stems

  1. Bring a medium-size (or larger) saucepan of water to a boil over medium-high heat. Drain the potatoes and add them to the boiling water. Bring to a boil again. Then lower the heat to medium and cook, partially covered, until the potatoes are barely cooked, 2 to 4 minutes. (Cut into such small cubes, the potatoes will cook quickly, so be careful not to overcook them). Reserving 1 cup of the cooking water, drain the potatoes. (I would suggest to reserve all the cooking water).
  2. Preheat a wok over medium-high heat. Add 1/2 teaspoon of the oil and sprinkle in the fennel seeds, cloves, dried chiles, and cinnamon pieces. Stir-fry until the chiles blacken slightly and the spices are fragrant, about 1 minute. Transfer the roasted mixture to a mortar, pound the mixture and grind it into a fairly smooth paste. (The spices will break down easily because they turn brittle when roasted. I don't recommend using a blender to make this paste because of the small quantity of ingredients).
  3. Reheat the same wok over a medium-high heat. Pour in the remaining 2-1/2 teaspoons oil, and add the mustard seeds. Cover the wok and cook until the seeds have stopped popping (not unlike popcorn), about 30 seconds. Then add the split peas and stir-fry until they turn golden brown, about 30 seconds.
  4. Add the onion and the spice-ginger paste and stir-fry until the onion turns golden brown and the mixture smells nutty-pungent, 2 to 3 minutes. Stir in the salt and turmeric. Pour in the reserved potato cooking water, and add the potatoes. Heat to a boil. Then reduce the heat to medium, cover the wok, and cook, stirrring occasionally, until the potatoes are fork-tender, about 5 minutes.
  5. Coarsely mash the potatoes with the back of a cooking spoon, and fold in the cilantro. Then serve.


Enjoy !


Sunday, March 6, 2011

Marble Cake

I love marble cakes. There's something about them that sets them apart from other cakes. The batter is just like an ordinary butter pound cake, with some cocoa powder added  in one part and the other part remain plain, lightly swirl into the pan together to get a marbled effect. Plain and simple, and everyone knows that. But why, does it holds a special place amongst the many cakes around?  It has been around as long as I can remember, good old-fashioned all time favourite.


When I was browsing through Sarabeth Levine's blog a couple of weeks ago, this marble cake caught my attention, and I knew that I was going to make it sooner or later.  This is a lovely cake to have for afternoon tea and great for breakfast too, don't forget that cup of hot steaming black coffee, really goes well with this cake.


This is a really good cake, my sister loves it. There's a light almond fragrance which I find really nice, but not my kids! I thought that since the recipe calls for only 1/4 teaspoon of almond essence in the chocolate batter, my kids might not notice it so much, but they did! That is why I hardly use my bottle of almond essence, as they do not like the smell of almond essence.


I guess that most of us have a marble cake recipe somewhere, either an old family favourite recipe or perhaps a new acquired one. I do have an old family favourite, but then that's another day and another post, as soon as I can find it!

Marble Cake
(source from : Sarabeth)
Makes 10 to 12 servings
Bakers Note : For the easiest way to transfer the batters to the pan, use a 2-1/2 inch diameter ice cream scoop.
Softened butter for the pan
2 cups unbleached flour, plus more for the pan
2 teaspoons baking powder
1/2 teaspoon fine sea salt
12 tablespoons (1-1/2 sticks) unsalted butter, at room temperature
1-1/2 cups plus 3 tablespoons superfine sugar, divided (I use 180gm plus 3 tablespoons)
4 large eggs, beaten, at room temperature
1 teaspoon pure vanilla extract
1/3 cup Dutch-processed cocoa powder
1/3 cup brewed strong coffee, cooled
1/2 teaspoon instant espresso coffee powder
1/4 teaspoon almond extract

  1. Position a rack in the center of the oven and preheat to 350F. Butter and flour the inside of an 8-cup fluted tube pan and tap out the excess flour.
  2. Sift the flour, baking powder, and salt together. Beat the butter in the bowl of a heavy-duty standing mixer fitted with the paddle attachment on high speed until smooth, about 1 minute. Gradually beat in 1-1/2 cups of the sugar, then add the vanilla. Beat until the mixture is very light in colour and texture, (scraping down the sides and bottom of the bowl with a silicon spatula occasionally) about 5 minutes. Slowly beat in the eggs. Reduce the mixer speed to low. In thirds, add the flour, scraping down the bowl as needed and beating until smooth after each addition.
  3. Whisk the cocoa, coffee, instant espresso powder, remaining 3 tablespoons sugar, and almond extract together in a medium bowl to dissolve the cocoa. Transfer a little less than half of the batter to the cocoa mixture and mix with a spoon until smooth. Using a 2-1/2 inch diameter ice cream scoop, alternate scoops of the vanilla and chocolate batters into the pan. With a chopstick, swirl the batters together, taking care not to touch the sides of the pan. Gently smooth the top.
  4. Bake until the top of the cake springs back when gently pressed with your finger, and a cake tester inserted into the center of the cake comes out clean, about 55 minutes. Cool on a wire cake rack for 10 minutes. Invert the cake onto the rack to cool completely.
(The cake can be stored at room temperature, wrapped in plastic wrap, for 3 days).